

Follow these key steps to use vMix Live Production Software with your BoxCaster.
NOTE: vMix is a Windows/PC only product unless you install Windows on your Mac. Click Here for more instructions
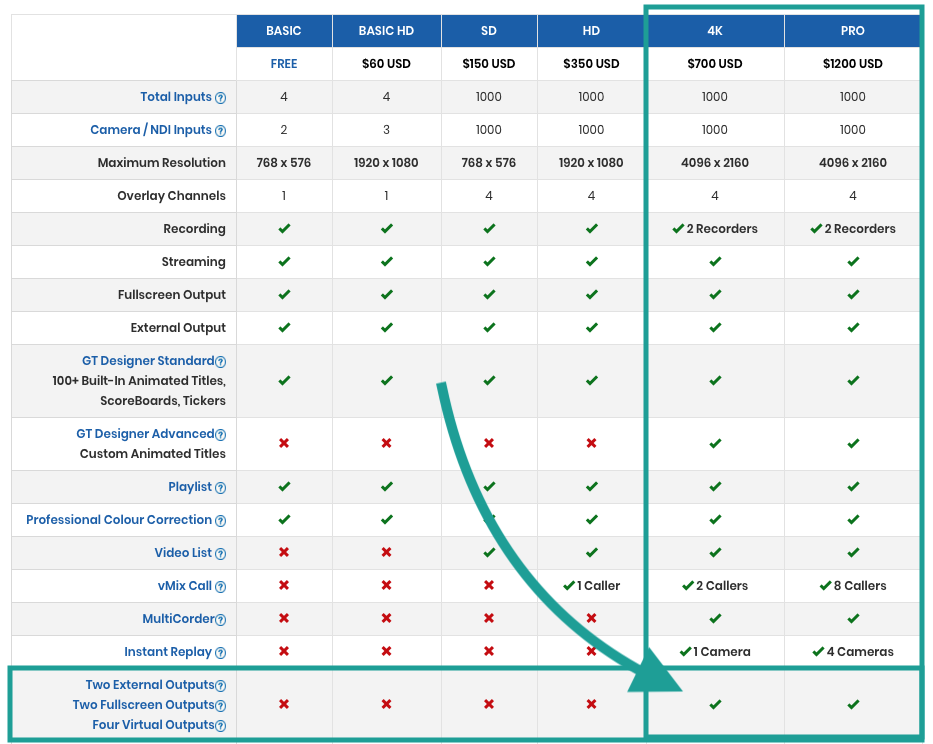
For this to work, you do need to have the 4k or Pro version of vMix. Below is a chart of their plans if you are unsure what plan you are on.
1. Plug the BoxCaster into your computer with an HDMI cable.
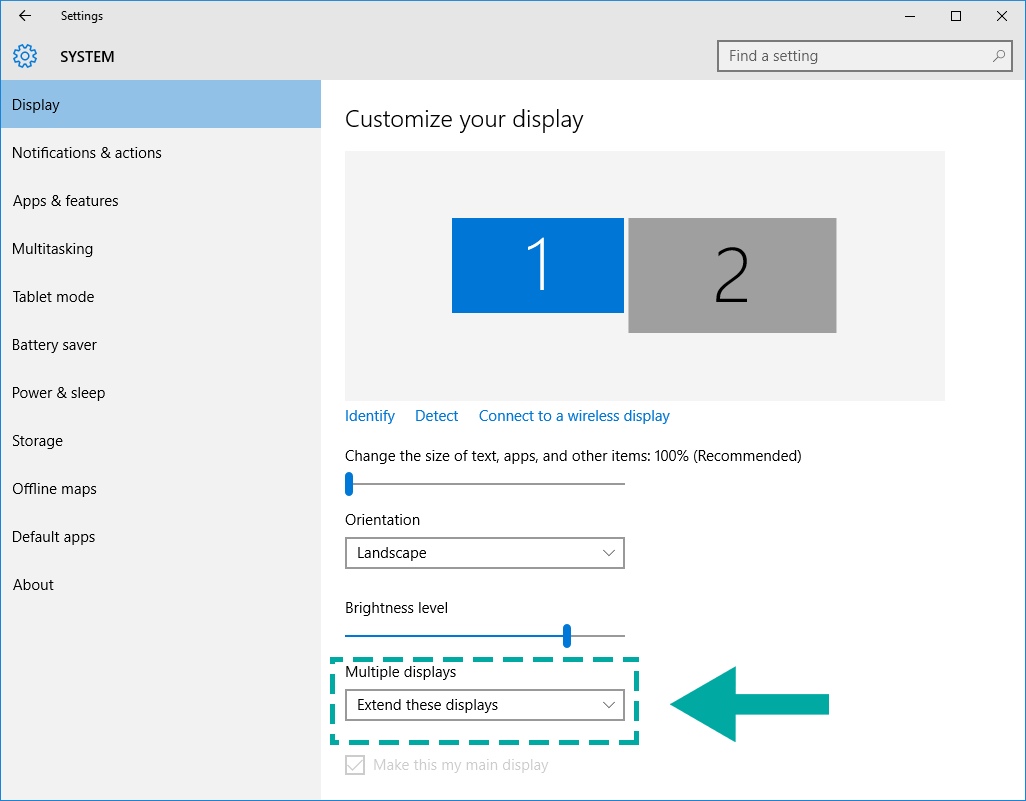
2. Go into your computer's settings and go to the display options. You will want to set the BoxCaster to be a second display or extended display.
3. Open vMix Software.
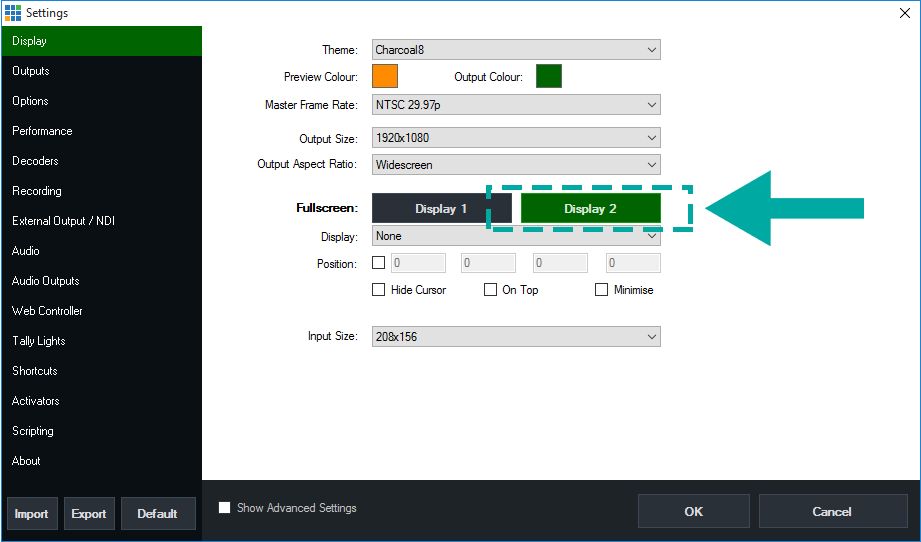
4. Go to the Display settings in vMix and set the fullscreen option to "Display 2."
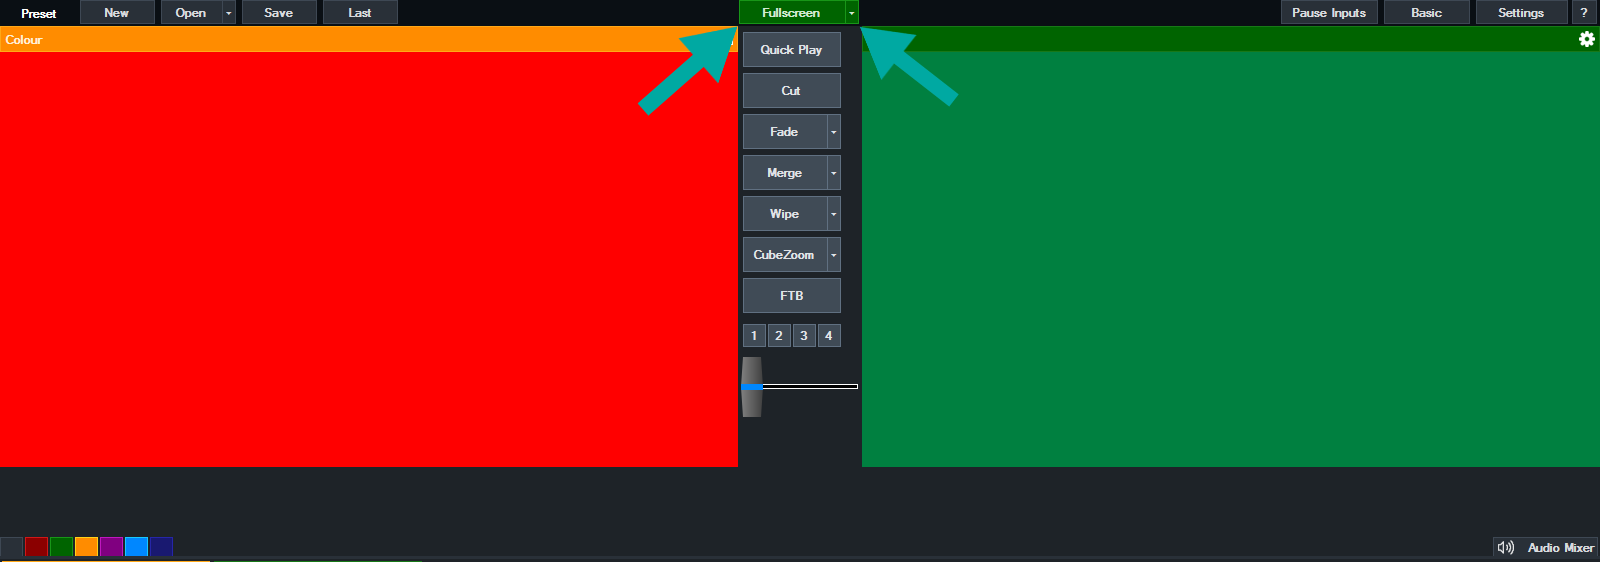
5. Now click on the FullScreen button in the middle of the vMix Software, and that will send the program feed to the BoxCaster.
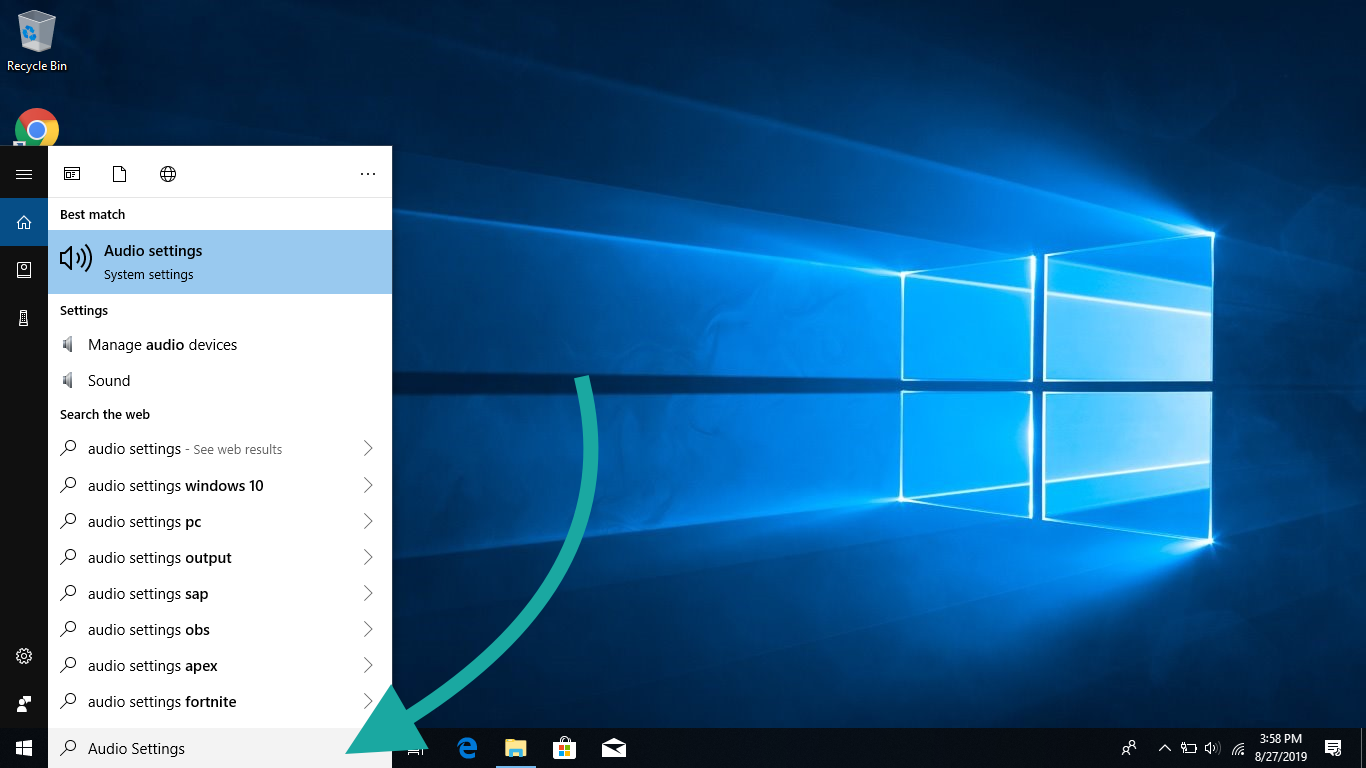
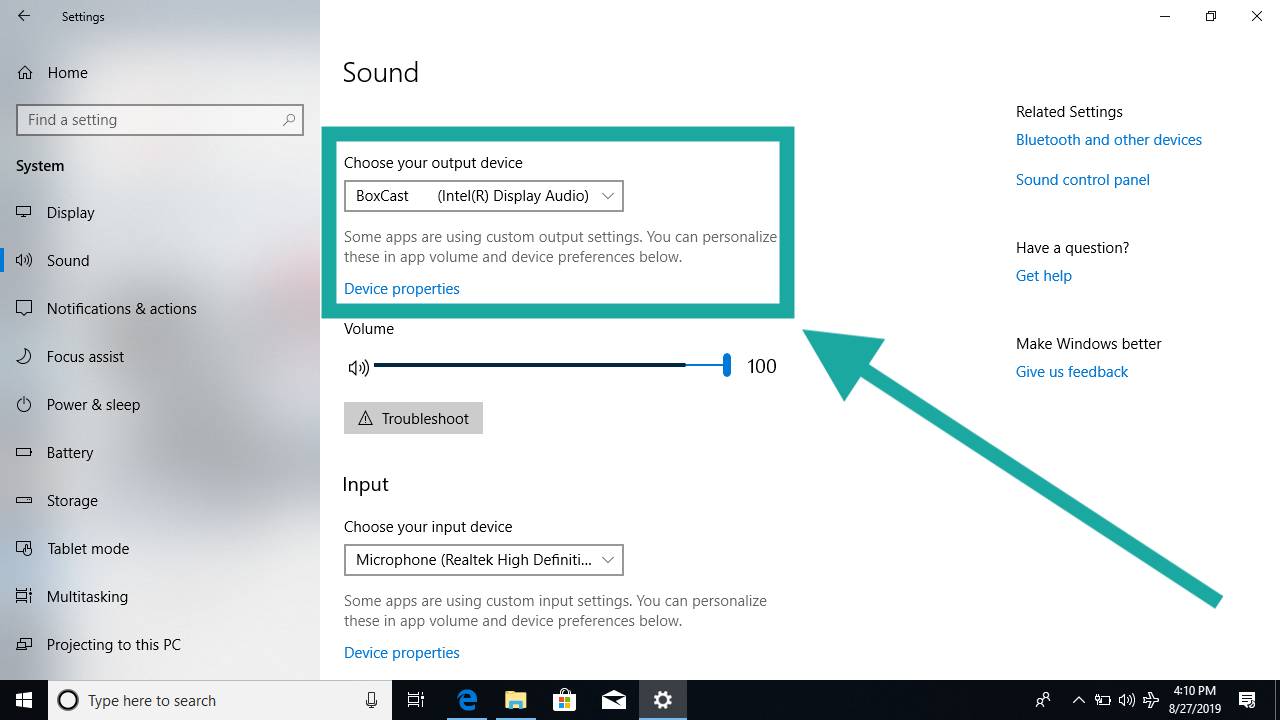
6. Lastly, if you plan on sending audio over HDMI to the BoxCaster you will want to change the audio settings of the computer. To do that, go to your audio settings on the PC and select the BoxCaster as the main output for Audio.
Things to remember when using a BoxCaster with vMix:
- The BoxCaster will not go live until the scheduled start time. By clicking the Fullscreen button, this will only enable the box to see the program out feed from vMix. You can do this anytime before the broadcast starts.
If you are looking to stream with RTMP from vMix to BoxCast, check out this article - https://boxcast.zendesk.com/hc/en-us/articles/115003531006