

Note: You will need to decide where on your organization's website you want the video player to appear. You may need help from your website manager for this step. This only needs to be done one time.
This article describes how to embed an entire channel of content onto your site. If you want to embed an individual broadcast on your website, see instructions here.
1. Click "Embed" on the left menu bar.
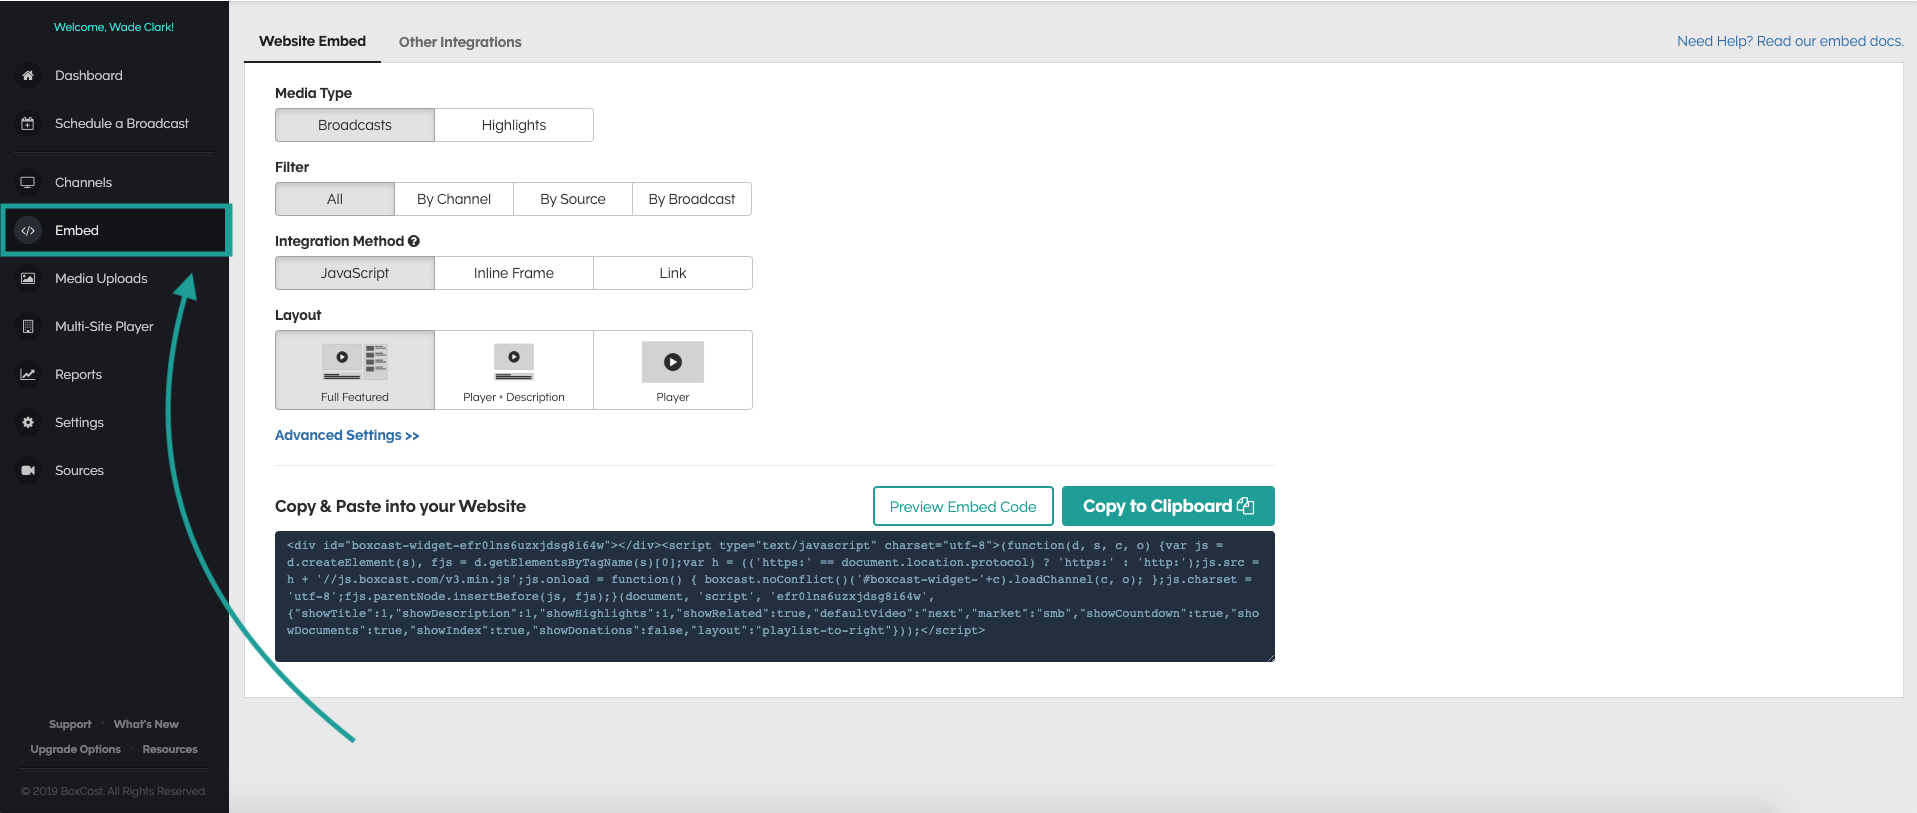
2. Select a Media Type. The Broadcasts tab will include all your public broadcasts in your account. The highlights tab, will show all the highlights from your account in an embed code.
3. Select a Filter.
All (Recommended): This is the "Master" widget. It will show ALL events (excluding Private) that you schedule on your account.
By Channel: This widget only shows events that are tagged for a specific channel that you have created. For instructions on creating a custom channel click HERE.
By Source: This widget will only show events that are scheduled on a specific to the Source you choose (rtmp, boxcaster etc.)
By Broadcast: This widget will only show ONE upcoming or current event (selected from the drop down after choosing this option). You can also find this code on the video page for the event in question.
4. Select an Integration Method.
Javascript: Most of the time, you should select the default JavaScript widget.
Inline Frame: If your web hosting provider does not allow JavaScript or if you experience conflicts with your site's other JavaScript) you can select the Inline Frame method. Note that this is NOT responsive and will not resize automatically to different device screens.
Link to BoxCast.tv: The simplest method - Link to BoxCast.tv - generates a URL that you can simply share on Facebook, Twitter, in an email, etc. to direct your viewers to watch your content without any hosting requirements.
5. Select a Layout. To see what options come with each layout, click on the advanced settings and feel free to customize it from there.

Advanced Display Options
Default Video Selection
The logic that BoxCast uses to determine the first video to be shown can be altered.
Show next event immediately: (default) With this option, the widget will default to showing and selecting the next future event as soon as the current live event ends.
Show closest event: With the *closest* option, the widget will only show the next upcoming event when it is closer in time than the previous recording.
Layout Customization
Show Description Below Player: Check this box to include any title and description you add to an event. This will appear beneath the embedded player.
Show Documents: This will display your documents if attached to the broadcast.
Show Video Index: This will display your video indexing if you set that up in the broadcast.
Two-Column Layout: Slight style change to the widget. Archives will appear to the right of the video player instead of underneath.
Show Playlist: Check this box to show past events that have been broadcast. The player will display the last 20 in chronological order. To show events further back viewers can simply click the last event in line and more options will appear.
Hide Overlay Messages Before Broadcast: This will hide all overlay messages like your countdown timer before the broadcast starts.
Player Settings
Customize Auto-play Behavior: If selected, you can decide if (and how) the video begins playing when a visitor loads the page.
- Do Not Auto-play: the player will not try to play automatically; the viewer will have to click or tap the player to begin.
- Try With Sound: the player will attempt to play the stream automatically; if the browser prevents auto-play, the viewer will have to click or tap the player to begin.
- Try With Sound or Muted: the player will attempt to play the video automatically; if the browser prevents auto-play, the player will mute itself and try to play the stream again (many browsers allow auto-play if the video is muted).
If this option is not selected, live broadcasts will default to Try With Sound, and recorded broadcasts will default to Do Not Auto-play.
Disable Live DVR: By default, DVR scrubbing is enabled for all live videos. If checked, the player will disable the feature.
Additional Features:
Countdown Timer: If selected, the player will show a large countdown timer for future events (as opposed to the default of just showing the date/time of the broadcast).
Custom Poster Image: This image will show behind the play button instead of the automatically captured frame. The image should match the video player aspect ratio of 16:9. It is recommended to be in JPG or PNG format with a resolution of 1280x720.
Custom Pre-Event Video: This video will play in a loop before the event starts. The video should match the video player aspect ratio of 16:9. It is recommended to be a 720p MP4 video encoded with the H.264 codec.
6. After you have selected your settings, now its time to Preview the Embed.
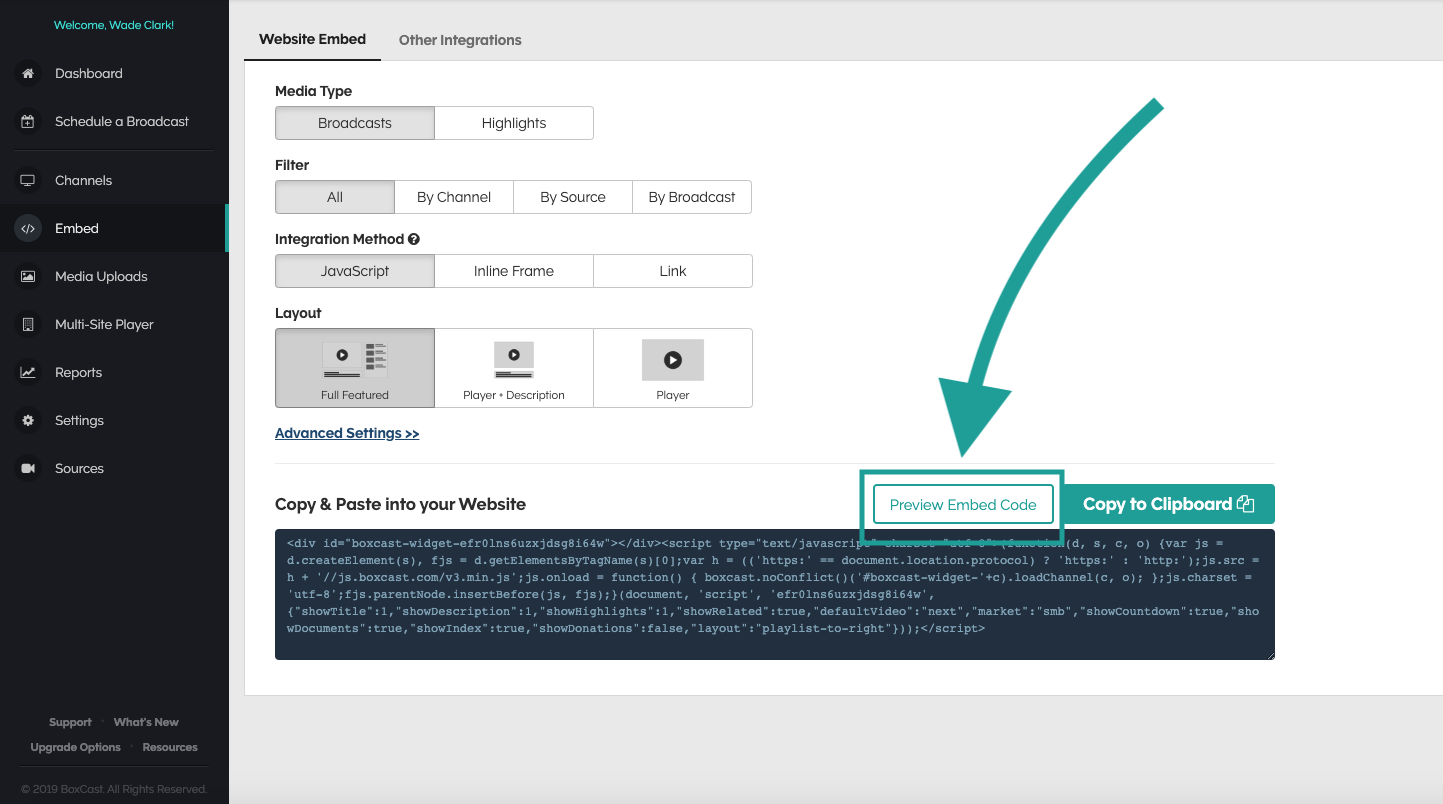
Please click the Preview Embed Code button to ensure the widget displays the proper events with the settings you have configured. When you are satisfied, copy the generated code.
Click "Copy to Clipboard" in the Generated Code section then paste the code into the appropriate section on the backend of your website.
7. Copy and paste your embed code in your website and it will automatically update with all public broadcasts.
Common Questions:
1. Why won't my player go full screen?
If you cannot make the player go full screen when clicking the Expand button on the widget then it is likely that you have the widget code posted in an iframe with no "allowfullscreen". Enable full screen in your CMS and you should be good to go.
2. Do I have to embed on my website?
No, but we highly recommend doing this so you can get better analytics from our tools provided.
Third-Party App: You can also select the Third-Party App widget to generate a web URL that can be embedded into other mobile apps such as Subsplash.
javascript, iframe, i frame, i-frame, java script, html, snippet, embedding